Friday, February 25, 2011

Vintage Design - Ruffled Crocheted Dishmop


This vintage design could have been in my mother’s hope chest. How much more fun it would be to wash the dishes with this charming little scrubbie! I love vintage household items. The pattern for this dishmop appeared in an old newspaper. Here is a link for the original pattern. These old patterns were sometimes very brief! The writer assumed that the reader had enough crochet experience to understand what may come next, without having to write all of it out. In case you don’t have that experience, I’ve added some additional directions to the original pattern. I certainly don’t claim to be the designer, I just want you to be able to understand what the pattern actually means for you to do. The dish mop is not hard to make, but it becomes a wee bit unwieldy as you crochet. You may need to be patient, and just keep pushing the previous stitches aside.

Ruffled Crocheted Dishmop

I used one ball of yellow cotton thread, size 3. I used a size US0/2.55mm (Susan Bates) steel hook. The edging used several yards of green thread of the same size. I considered the project after row 6 and ended up pulling that row out. I thought that it just seemed too thick and ruffly, and I didn’t want the dish mop to mildew before it could dry out. So, I added the final row 7 to row 5 and called it good. With a smaller sized thread, I would probably want to keep row 6.

(abbreviations: ch=chain, dc=double crochet, sl st=slip stitch, sc=single crochet)

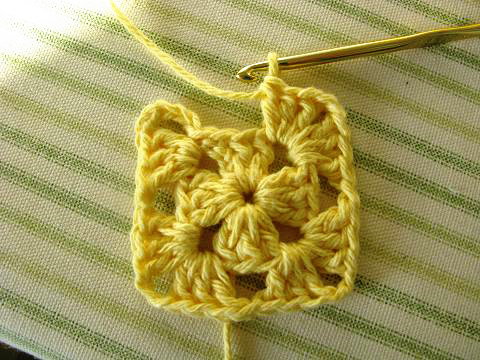
Foundation: Chain 10. Join with a slip stitch to the first chain to form a ring. Row 1: Chain 3. Make (dc, ch 1) 29 times in ring. (Catch the thread end under the stitches, then clip.) Join with a sl st in the top of the ch 3 at beginning of the round. (Ch 3 counts as the 1st dc of each row) (30 dc) Row 2: Chain 3. Make (dc, ch 1, dc, ch 1) in each ch 1 space around. Join with a sl st in the top of the ch 3. (60 dc.) Rows 3 through 5: Repeat row 2. (120 dc) (240 dc) (480 dc) Leaving a 3" tail, clip the thread and pull through the loop to finish off this color. Row 6: Add a contrasting color with the chain 3. Make (dc, ch 1) in each ch 1 space around. Join with a sl st in the top of the ch 3. Finish off this color as before. (480 dc) Row 7: Add the main color with a chain 2. Make (sc, ch 1) in each ch 1 space around. Join with a slip stitch in top of ch 2. Fasten off as before and weave in all the thread ends. Hanging Loop: With main color, join between any stitch in the starting ring with a chain 15. Join with a sl st on the opposite side of the ring. Turn. Make (1 sc, 22 dc, 1 sc) over the ch 15. With the edging color, if desired, make 1 sc in each stitch around the hanging loop. Fasten off and weave in the thread ends.

I sometimes wonder if ours is the only household left in America still doing the dishes by hand. Our small kitchen just doesn’t have room for a dishwasher. Doing dishes is not such a chore when I can use pretty dishcloths and dishtowels, and this little dishmop is positively darling. Miss Abigail definitely gets one or two of these in her hope chest.


Edit: If you like this little dish mop, you may be interested in a second rewrite of the pattern, more suited to worsted weight "kitchen cotton" yarn. View that post and get the pattern here. --km

Friday, February 18, 2011

Granny Square Dishcloth - My Favorite


This tutorial shows a slightly different way to make a granny square dishcloth. It is my favorite method because it works to “hide” that initial chain that counts as the first dc in each round.


As Abigail mentioned, you need 100% cotton yarn. I like Lily’s Sugar and Cream because it is widely available and reasonably priced. Lion brand yarn has a wonderful hand, but it is more expensive. Use a size "G" hook.


Round 1: Chain 4. Join with a slip stitch in the first chain to make a ring. Chain 5.


Make 3 dc in ring.


Ch 2. Make (3 dc, ch 2) twice more in the ring, catching the loose thread end.


2 dc in ring. Make a slip stitch in the 3rd chain of the chain 5 at the beginning of the round.


Slip stitch in the next chain also and then chain 5 to begin a new round.


3 dc in the space at the bottom of the chain 5.


* Ch 1. Skip the next 3 dc, (3 dc, ch2, 3 dc) in the next corner space.


Repeat from * twice more.


Ch 1. (Skip the next 3 dc. Put 2 dc in the space at the bottom of the chain 5 from the beginning of the round. Slip stitch in the 3rd chain of the ch 5.


Slip Stitch in the next chain and then chain 5, as before.


Round 2: Put 3 dc at the bottom of the chain 5. Ch 1. Skip next 3 dc. 3 dc in the next space.


Ch 1. Skip the next 3 dc, (3 dc, ch 2, 3 dc) in the corner space.


* (Ch 1, 3 dc) in the next space. Chain 1. (3 dc, ch 2, 3 dc) in the corner space. Repeat from * around.


Ch 1. 2 dc in the space at the bottom of the beginning ch 5. Sl st in 3rd ch of ch 5. Sl st in the next ch also and then ch 5, as before.


Round 3 and more: Begin the round as in previous rounds with (3 dc, ch 1) in the space immediately below the chain 5. Make (3 dc, ch 1) in each space across the sides and (3 dc, ch 2, 3 dc, ch 1) in each corner space. To close the last corner, put 2 dc in the space at the bottom of the chain 5 from the beginning of the round. Slip stitch in the 3rd chain of the ch 5, and in the next chain. Chain 5 to start a new round.

Finish by closing the last corner with 2 dc in the space at the bottom of the chain 5. Slip stitch in the 3rd chain of the chain 5. Cut the thread and pull through. Weave in the end.

I usually do about 7 rounds, including the initial round in the ring. But you can keep going if you like a bigger size. After the last round, you can stop, as Abigail did, and do a loose single crochet in each stitch around the entire dishcloth, to make a more finished edge. I want to show you how I like to finish a granny square dishcloth.


I change colors on round 7 and do this last round with the edging color.


To start the edging round, instead of a chain 5, I chain 4. Then, I put 2 dc in the corner space immediately at the bottom of the chain, as before. Ch 1 and one more dc in the same space.


* Skip next dc. Dc in next 2 dc. Dc in the space. Repeat from * across to the space that turns the corner. (1 dc, c 1, 2 dc, c 1, 1 dc) goes in the corner space.


Repeat from * across the sides, turning the corners as explained until you read the beginning chain 4. Finish off.  You can stop at this point also, but I like to add a further lacy edging in the same color as the middle of the granny square.


Add color with a chain 4 between the 2 dc in the corner. Skip dc. Slip stitch in the next space. * (Ch 4. Skip next stitch, sl st in the next st). (The photo actually shows a single crochet in this stitch. I sometimes do this on the corners because it makes the edge lie better at the corner. But you can just do slip stitches if it is easier to remember.) Repeat from * all the way around, making sure a slip stitch goes into each corner, between the 2 dc. Put the last slip st next to the beginning chain 4. Finish off and weave in all the ends.

I like to "block" my crochet. It just looks so much more finished and pretty. I adjust and square up all the stitches and pull the lacy loops out a bit. Then I hold the steam iron just barely over the cloth and let the steam flow for a minute or two. Then, let it dry in place.

Friday, February 11, 2011

Crocheted Dishcloths


I made this granny square dishcloth for a 4-H project. It took about two days to make and I think it will be useful to put in my hope chest.

My mom and I like crocheted dishcloths better than commercial dishcloths because they last a very long time, absorb water better, and are sometimes prettier. My mom has made lots of crocheted dishcloths for our household. She makes them for wedding gifts, and she has made quite a few sets for my hope chest. If you make them too big or too thick, it is hard to squeeze the water out. You have to hang them up to dry or they will smell bad.

Crocheted dishcloths are really very easy to make. You just need to have the skills and materials. I learned how to make a granny square from the 4-H project. My mom was the leader for the project. You need to use 100% cotton yarn because this type of yarn absorbs water into the fiber. Acrylic yarn doesn’t, so it won’t work for dishcloths. You can buy cotton yarn at Walmart and Hobby Lobby. Use either a "G" size or an "F" size crochet hook.

You also need time to crochet. It helps if you like to do it. Crochet is not my favorite thing to do. I get kind of restless because it seems to take a long time. Mom says I just need more practice. When I see all the pretty things you can make with crochet, it makes me want to stick with it.

Respectfully submitted by Miss Abigail.

A note from Kathleen:

There are a couple of ways to make a granny square. Abigail’s pretty dishcloth is made using the granny square pattern required by her 4-H crochet project. I instructed her to add a final row of single crochet in each stitch around to make a bit more of a finished edge.

You can find directions for making a granny square in many places. Just add however many rounds you wish until the size is just right. The patterns usually read something like this:

Round 1: Chain 4 to 6 and join with a slip stitch in the first chain to make a ring. Chain 3. (This chain counts as the first dc stitch.) Make 2 dc in the ring, catching in the loose thread end. (ch 2, 3 dc) in ring. Repeat (ch 2, 3 dc) twice more. Ch 2 and join with a slip stitch to the top of the starting ch 3.

Round 2: Chain 3. Make 2 dc in the corner space (immediately below the chain three). Ch 1. Make (3 dc, ch 2, 3 dc, ch 1) in the next corner space. Repeat (3 dc, ch 2, 3 dc, ch 1) twice more. Make 3 dc in the next (first) corner space. Ch 2 and join with a slip stitch to the top of the starting ch 3.

Round 3 and more: Repeat the same pattern. (ch 3, 2 dc, ch 1) in the corner space. This makes the initial corner. Put a group of (3 dc, ch 1) in each space across the side. In the corner spaces, put (3 dc, ch 2, 3 dc, ch 1). Begin the rounds and close the last corner as in round 2.

edit: Tipnut has several links for more crocheted dishcloth patterns. Tipnut is such a great internet resource! -km

edit: Here is a link to a later post that shows an easy scalloped edging for this pattern. -km

Friday, February 4, 2011

Everyday Beauty


Once you fall in love with the idea of making a home, you find infinite pleasure in making it suitable, comfortable and even beautiful.  But, too often we put away our beautiful things because, well, they are too beautiful. “This is too nice to use for just everyday,” we say. We’ll save it for the holidays or when guests come to visit, and content ourselves with the plain and practical for everyday.  But our home is the space that encircles both our body and our spirit. It ought to be beautiful. No matter where we live, even in a temporary situation, a home is something we can create with the currency of beauty.

Why should you use a dishrag when you can easily use a dishcloth? Why should you use a dust rag when you can easily use a dust cloth? Truly, it is just as easy to use a towel that has, in some way, been made beautiful as it is to use a plain one, or one that is worn out or ugly. Of course, my home is more than those physical objects that surround me, but I find that my happiness is greater when I see, use, and enjoy everyday things that are beautiful. My everyday attitude is much improved.

Lest you get the wrong impression, I’ve used my share of rags, plastic cups and worn out blankets. But, I’m becoming wiser to my own happiness. It doesn’t take much to add a little beauty to everyday things. It does take a deliberate choice to actually use them.

If you own a pair of plain (white or printed) pillowcases, I challenge you to pull them out and use the following tutorial to add some simple, everyday beauty to your home.


Materials: Besides the pillowcases, you need a package of rick-rack trim, 6-ply cotton embroidery thread, two small embellishments, and a needle.


Measure the rick-rack trim, cut and pin it around the hem of the pillowcase.


Measure a length of thread three times the width of the pillowcase and cut. Use all 6 plys and thread the needle. Knot the thread.


Fold a bit under the end of the trim and bring the needle up in the corner. Make a tacking stitch. Do this on both the top and bottom edge.


Bring the needle up at the inside edge of the trim.


Take a small stitch, within the inside edge of the rick-rack trim. Take another stitch on the inside edge diagonal to your other stitch. Stitch, back and forth, within the inside edges of the rick-rack trim all the way across. The thread lays across the trim, tacking it securely to the pillowcase.


Work these small stitches in each wave across the length of the trim. Make the stitch smooth and snug, but don’t pull too tightly or the fabric will pucker.


When you come to the end of the trim, take another small tacking stitch on the top edge to secure the end and make it neat.


Tack down the bottom edge as well, and tie off the thread securely.


Sew on the embellishment. A ribbon rose, a button, or an applique would also make a cute decoration.


You are finished. Now use them. You’ll feel like a queen!
Related Posts Plugin for WordPress, Blogger...