Showing posts with label fabric painting. Show all posts

Tuesday, July 5, 2016

Tutorial: Derwent Inktense Dishtowel


You may remember that I posted some time ago about keeping an art journal. Part of my supplies for the art journal is a small set of Derwent Inktense dry ink blocks. I have known that these could be used on fabric and have wanted to fool around with them and today I did. So here's a tutorial on how to use Inktense color blocks to embellish a plain cotton dishtowel. I can certainly use some more practice, but the project was easy and quick and I think it is a useful technique to decorate items for the hope chest.

As far as materials go, you'll need a set of Inktense Blocks. These are dry, water-activated ink blocks. So you can draw or trace lines on the fabric and then activate the ink with water from a blender pen or a brush. It works just like a watercolor pencil, but the color is much more vibrant and intense. BTW, I have no affiliation - I just like this product. I got my set at Michael's. You will also need a 100% cotton dishtowel. You can draw a freestyle design on the towel, but I used an iron-on transfer because I'm just not that great at drawing. You'll also need a small cup of water to activate the ink and a couple small brushes. A black fine-tip Sharpie marker will be used to trace the original transfer design after the ink has dried. Oh, and you'll need something to protect the work surface since the ink will soak through to the other side.


Wash the towel to remove any sizing and then iron it smooth.
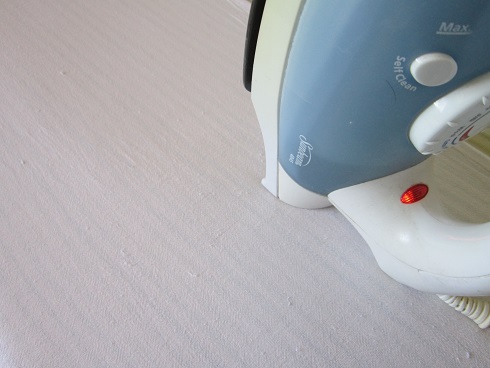

Center the design on the towel and follow the directions to transfer the design.


I first used the dark brown ink block to trace the branch of the apple tree. Then I lightly colored the branch with a lighter brown color. I traced the leaves with a dark green, and the apples with the red color. I added some orange to the apples and a bit of yellow as well.


The ink has to be wet in order to activate. Use the brush and a cup of water and "paint" over the lines of ink. The fabric will wick the water outside of the lines. I used a lot of water because I like this effect. You may wish to be more careful.

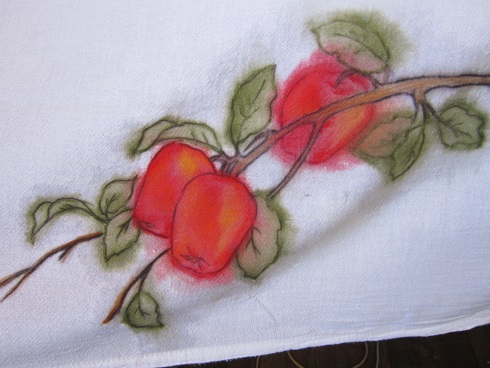

While the fabric is wet, you can use the block to add more color or use other colors to add shading. The ink goes on very thick when the fabric is already wet. Just use a little more water to make sure this second application of ink is activated and won't wash out later. Brush the ink further into the design to darken and shade the design.


After the ink is dry it becomes permanent. Because the inked lines become so blurred, I used a fine-point Sharpie pen to trace the transfer lines.


I ironed the towel again to heat set the ink. I know the ink is permanent, but with an item that will be used and washed often, I think the heat set will be a back up option. Even the back looks great!
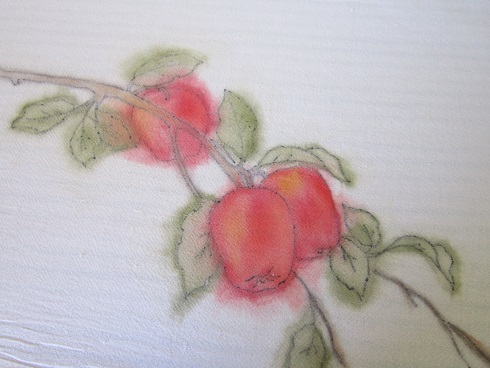

So here is the finished towel. I've used wax crayons to color on fabric in other projects, but these vibrant Derwent Inktense Blocks are so lovely and work so much better, I believe. I am now planning even more projects! A simple design on a crib sheet would make a cute gift.


Thursday, October 4, 2012

Stenciled Dish Towel


You see a lot of stenciling on the blog because it is so easy and quick to do and I think the results are so fun! I made a set of dishtowels recently to include in a wedding gift and I thought I would show you how I did it. Miss Abigail wrote a more basic tutorial on stenciling for beginners, if you need to see the actual technique.


Start by washing and drying the dishtowel. This removes any sizing or starch from the towel and allows the paint to penetrate into the fibers of the cloth. If you skip this step, the paint will likely fade much faster. Place a piece of cardboard or tin foil beneath the dishtowel, to prevent the paint from soaking through to the table. I use the Tulip soft fabric paint and whatever stencil strikes my fancy.


Use a just barely damp sea sponge and dab it lightly into green fabric paint. Lightly dab the sponge onto the towel to create a foliage background for the flowers that will come on top.


Add just a tiny bit of darker green to give the background some dimension. Use just a tiny bit!


Use the stencil to add flowers and leaves in a design across the foliage background. I blended two tints of the same shade while the paint was still wet to give the flowers a little dimension as well. I also added just a few dabs of a purple color between the flowers. Let this much dry. The directions for the fabric paint will give you the proper length of time.


After the flowers were dry, I stenciled smaller flower "centers" on top of the main flowers. I also used the end of the paintbrush, dipped in the paint and a very tiny brush to add further details and highlights to the flowers. Finally, I used another stencil with two colors to add the word.


Stenciling is really not hard to do and it makes me feel so artistic! So many projects for the hope chest can be stenciled. Dishtowels, of course, and pillowcases -you just need to be creative.

Thursday, July 19, 2012

Cute Summertime Outfit

Miss Abigail has had a VERY busy summer this year. It has been all I can do to keep up with her and get her where she needs to be, with what she needs to have, prepared to say what she needs to say! Mostly it all has to do with 4-H, which is a fabulous program and I love, love, LOVE it! But, this year seems to have been especially demanding for some reason. Maybe just because I'm getting older every year... Anyway, we are now in the middle of what we call the fair "crunch." Our county fair happens twelve days from now and we're on a serious deadline to get all the project exhibits finished.


For the Creative Touches 4-H project, Abigail used the celery rose printing technique to embellish a tee shirt. You might remember the tutorial on this technique. The top turned out so cute! She is really becoming skilled at this embellishing thing...


She also re-purposed a pair of too-short jeans by cutting them even shorter, creating a cuff, and adding a line of yo-yos on top of the stitched hem. Yo-yo's are one of the techniques Abigail has learned in this project. Abigail really liked the way everything turned out and wanted to wear it right away, which made me very happy. Then she added a little yo-yo bouquet to a denim  visor to accessorize the ensemble.


The whole outfit was then judged for construction technique and modeled in our District Fashion Revue contest. One nice thing about this project (and the contest) is that the outfit is now finished and ready for the county fair! One more item checked off the list. ;o)

Yes, the first place medals for the Creative Touches project are around Abigail's neck.
Her good friend Avery also won first place for her darling "Sew and Go" duffel bag.


Monday, February 27, 2012

Fabric Printing Demonstration


As part of her 4H project work, Miss Abigail gave a demonstration of celery rose printing in a recent meeting of the Stanley Homemakers Club. I think the ladies enjoyed it. I just wanted to show how creative one can be with this technique. After her demonstration, Abigail invited the ladies to try printing with celery on a plain white dishtowel. You can see that each of the ladies who made a dishtowel were somewhat unique in their interpretation.


I made a towel to match the one Abigail made, so that she would have a set for the hope chest.


Tuesday, February 21, 2012

Celery Rose Printing


I saw this interesting technique and thought how fun and easy it would be to print an apron for the hope chest. The materials are simple: an apron, fabric paint, a piece of foil to hold the paint, and the discarded bottom of a stalk of celery! You will also need wax paper or cardboard to place under the apron to protect the table surface and a paper towel to blot the paint.

The celery needs just a bit of preparation. Cut the stalk near the bottom and, if you like, clean out the leaves in the middle. It is also interesting with the leaf mass left in, but you can decide which you prefer. Cut the celery straight across, so that the stalks stamp evenly. You can see that we have a rubber band around the stalks. This is just a precaution in case a stalk breaks off.


Squeeze some paint onto the foil and spread it a bit. Dip the celery into the paint, covering all the cut surfaces of the stalk. If the paint seems goopy, blot the excess onto the paper towel. Then press the paint onto the apron.


Pick up a second color and make a second print, next to the first and then a third print. If you like, you can keep the colors separate, or try mixing them. A mix of colors gives a little bit of dimension or depth to the design.


Celery stalks can be variable, obviously. If there are spots that seem bare or too open, use just one piece of celery to add petals wherever you think they need to be.


Use one piece of celery with the green paint to add leaf shapes to the design.


Happily, Abigail has learned the design principle of thinking in terms of a triangle. I was pleased that she used three flowers in a triangular shape and placed the leaves also into a triangle. Not that the triangle is the only way to design, but it is a pleasing composition, and easy for children to understand.


I am amazed that a lowly stalk of celery can produce such a beautiful design. If you have a plain, white dishtowel languishing in your kitchen drawer, this would be a great way to pretty it up.

Related Posts Plugin for WordPress, Blogger...