Tuesday, May 31, 2011

Sewing - Ladybug Outfit


Miss Abigail has finished the "ladybug" outfit for her 4-H sewing project. I think it turned out so well! She really looks darling in it and I’m just as proud as I can be. She did such a beautiful job on the sewing.  It seems like everything that came after the collar was so much easier! Even the sleeves went in pretty well. We bought a special foot to help with the top-stitching and the machine did a splendid job on the buttonholes. The buttonholes were Abigail’s favorite part. She kept saying “Wow! I love this machine. Look mom, no hands!” Someday, maybe I’ll teach her how to make buttonholes the old-fashioned way.


Miss Abigail will enter the whole outfit, along with the pattern and instructions, in our county 4-H Clothing Contest, to be judged on construction and following the pattern. Hopefully, it will be passed on to the District contest, where Abigail will model it and the outfit will also be judged on appearance. In August, she’ll enter it in the County Fair. We are both relieved to have this project completed and I’m delighted that she has made so much progress in her sewing skills.


Saturday, May 28, 2011

Current Project - Crocheted Lace Trim


This crocheted trim is currently in my workbasket. I'm planning to add it to a pair of pillowcases. This is another thread trim that is very easy to crochet. It works up quickly and is practically mindless, once you get going. I can get about 20 inches made in 30 or 40 minutes, so it is a perfect project to take in the car, or to pull out while waiting at the dentist or the piano lesson. The trim uses a basic V-shell stitch and just turns back and forth on itself, over and over. There are all sorts of variations of this basic stitch and I have seen it in the foundation of many antique lace edgings. I think it looks nice as a simple flat pillowcase trim and it looks just as nice sewn on the woven band of a set of bath towels. I'll make a tutorial, just as soon as I help Miss Abigail finish the sewing project.

edit: the tutorial for this trim is found here -- crocheted v-stitch trim

Tuesday, May 24, 2011

Fancywork


I am intrigued by the term “fancywork.” Throughout history, and certainly since the cottage industry replaced the European guilds of the middle ages, women have had many sewing tasks. A woman’s hands were busy, first in making the fabric and then sewing it into clothing and household linen.

Of course, in England, until relatively recently, there was a class division of labor. This applied to sewing as well. Aristocratic women did not sew their own clothing. They employed servants to do this work, or commissioned their gowns from modistes or dressmakers. The wealthiest women could patronize a couturier or fashion designer. At most, these higher class women may have been involved in constructing or embellishing their underclothing. In America, this was less so. Even into the early 1900's, with the exception of the lucky some who maintained servants, most American women were sewing clothing for the family at home. Many members of the household were busy at this work.

Fancywork was the opposite of this routine household sewing. Fancywork describes that bit of extra embellishment that was added to garments, linen or other household goods. It might represent embroidery, needlepoint, crocheted or knitted trim and lace, netting, beadwork, or some other kind of needlework. It may include doilies, cushions, macrame, and other items made to adorn the parlor or bedroom.

I am intrigued by the term “fancywork” partly because of antique publications of patterns and projects that were produced from the mid to late 1800's and through the turn of the century. Such publications were directed at young ladies and women of the middle and upper-classes. These women, presumably had the time to devote to making and embellishing items that were, shall we say, more impractical or sentimental in nature. Lower-class women did not engage in fancywork, I assume, because they were too busy with other things, like employed work to feed themselves or their children. Hmmmm. There is an image that stands a bit on it’s modern head. After spending a couple of hours, early this morning, trying an antique pattern of crocheted lace, I guess I can presume that I am not a lower-class woman.

Of course, circumstances changed, even in the drawing rooms of the rich and privileged. In this new century, I am touched by examples of the fancywork of ordinary women found on ordinary things. Every time I visit my favorite antiques mall, I wonder at what I find. From embroidered household linens to embellished clothing, hats and even shoes. The internet is filled with marvelous modern examples of uncommonly beautiful fancywork. Women have always loved to be surrounded by beauty; to do fancywork. It keeps us from being “lower-class.” ;o)


Saturday, May 21, 2011

Progress with Sewing


Miss Abigail and I had a very productive day yesterday. Her sewing project for 4-H is coming along very well, and we worked happily together for most of the day. When we both started to get a little short and I started hearing things like, "I'm never going to learn to sew!" I decided we needed to put it away for a while. But, we can now check off the following skills:

  • Pinning and cutting out a commercial pattern
  • Using interfacing
  • Darts!
  • Grading seams
  • Sewing and turning a flat collar (we only unpicked it three times)
  • Sewing and turning a front shirt facing


Still to finish:

  • Sewing the set-in sleeves
  • Sewing a ruffled hem
  • Setting buttonholes and buttons
Miss Abigail also needs to sew the matching Capri pants, but she's done them before, so that should be straightforward enough. I think I deserve a pat on the back. ;o)  It was kind of a long day...

Tuesday, May 17, 2011

A Peek Inside - Mouse Dishtowels


Miss Abigail has a quite a few sets of dishtowels in her hope chest already, but this precious mouse set was made by a special friend. Doris learned to embroider many, many years ago and although she is now in her 80's, she still enjoys doing it. Her embroidery is exquisite! Doris’s tiny, careful stitches, with all the little details completed, make this set truly exceptional and I’m so glad that Miss Abigail will have these as a particular legacy from Doris.


I once asked Doris how she did the tiny details so well. She told me, “Well hon, you just have to use one strand of thread and make the stitches as small as you can.” Sigh...no shortcut there. Although I was initially taught to use two strands of thread, I sometimes use three strands so that I can make slightly bigger stitches and eat up the lines a little faster. Doris always uses two strands, unless she’s doing the details. Lesson learned. Just look at the following close ups of her work. She is an inspiration to me!


Doris is a member of the Stanley Homemaker’s Club, to which I also have belonged for many years now. The club was organized way back in about 1942 and is still going, although some members are now aged. Abigail is graciously welcomed by all of the ladies at our meetings. These ladies have watched her grow up and often spoil her with gifts and treats. She really loves club days and I am so grateful that she has many various and wonderful examples of the term homemaker.

 Doris and Miss Abigail at our recent club luncheon

Miss Abigail has several other items in her hopechest that were made or given by these wonderful women, including two other sets of dishtowels made by Doris. We’ll show those to you also, by and by.

Monday, May 9, 2011

Tutorial - Tucked Dishtowels


These cute tucked dishtowels are a fun project to add to a hope chest. They are very easy to sew, and they are quick; only about an hour from start to finish. Because there is no embroidery, I can take advantage of dishtowels that may be less expensive.

1.  Iron the dishtowel as square as possible. Honestly, this will probably be your greatest challenge! So many flour sack dishtowels are completely skewed and off-grain. Truly, it just makes me grind my teeth. Do your best to make the end with the intended tucks straight.


2. Use a washable marking pen to draw a straight line 2 ½ inches from the hemmed edge. Make the line as even with the hem as possible. Draw a second line, 1 ½ inches in from the first line. Draw a third line, 1 ½ inches from the second. If you wish to leave the tucks simple and straight you don't need to mark further.


3. If you wish to make alternating "waves" in the tucks, draw evenly spaced lines across the width of the towel also, making a grid. This towel was 30 inches in width and I spaced the vertical lines at 3 inches apart. I think the waves look better if they are spaced just a little closer, but in this case, a 3-inch measurement seemed to be best.You can experiment with how close you want your “waves” to be, but don’t make them too close or they won’t lay down well. The distance will obviously be determined partly by the measurement of the towel.


4. Once you have the grid drawn, it should look something like this.


5.  Fold on the long horizontal lines and sew the long tucks first. This is easy sewing. Even a beginning sewist can make these dishtowels. If you are helping a beginner, encourage them to pin the tucks so that they are sewn straight and smooth. If you are experienced, just fold the fabric along the marked lines and hold the tucks in place as you sew.


6. Press the tucks toward the hem. You can leave the tucks as is and trim the towels with a little embroidered flower or a button or an applique. Or, if you like, you can make the tucks fancier by sewing them into alternating "waves."


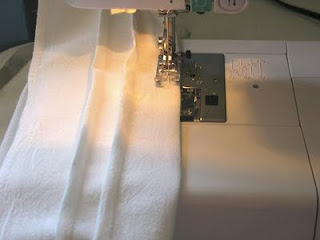
8. Sew vertically across the tucks, following the marked vertical lines. Alternate the direction, so that one line goes one direction and the next line pushes the tucks in the opposite direction. I put the needle down about 1/4 inch from the edge of the bottom tuck and completed the stitching at about 1/4 inch past the top one. Be sure to backstitch the ends of your stitching.


9. Stitch the edges down as well.


10. Finished tucks. You can see the pattern of alternate stitching.


11. Clip all the threads.


12. Wash the dishtowels to remove the markings and then press. Finished!


This post was shared in the Domestically Divine link-up. 

Tuesday, May 3, 2011

Mom's Stenciled Linen Luncheon Cloth


In honor of Mother's Day I wanted to show you another treasure. This stenciled linen luncheon cloth was made by my mother for her own hope chest, many many years ago. She gave it to me because I loved those cheerful yellow daffodils. I've always been impressed with what my mother can do, she is talented and capable in so many different ways. In this case, mom simply frayed the edges of a length of linen and stenciled the pattern on each corner. Mom used a darker color to shade and add dimension to the large flowers. She also stenciled in the corner of the small napkins. There were four napkins at one time, but one must have been lost or ruined.

Ladies from my mother and grandmother's generation used to entertain their friends at luncheons, teas or card parties. These small luncheon cloths were made to fit a card table or another small table. The hostess would plan and serve a light luncheon or other light refreshments. The menu was simple, usually two courses. The hostess always laid a nice table with a beautiful luncheon cloth and cocktail-sized napkins.

Stenciling is an easy, lovely way to embellish fabric items for a hope chest. Miss Abigail posted a simple tutorial about stenciling on fabric. See this post if you would like to try.
Related Posts Plugin for WordPress, Blogger...