These cute tucked dishtowels are a fun project to add to a hope chest. They are very easy to sew, and they are quick; only about an hour from start to finish. Because there is no embroidery, I can take advantage of dishtowels that may be less expensive.
1. Iron the dishtowel as square as possible. Honestly, this will probably be your greatest challenge! So many flour sack dishtowels are completely skewed and off-grain. Truly, it just makes me grind my teeth. Do your best to make the end with the intended tucks straight.
2. Use a washable marking pen to draw a straight line 2 ½ inches from the hemmed edge. Make the line as even with the hem as possible. Draw a second line, 1 ½ inches in from the first line. Draw a third line, 1 ½ inches from the second. If you wish to leave the tucks simple and straight you don't need to mark further.
3. If you wish to make alternating "waves" in the tucks, draw evenly spaced lines across the width of the towel also, making a grid. This towel was 30 inches in width and I spaced the vertical lines at 3 inches apart. I think the waves look better if they are spaced just a little closer, but in this case, a 3-inch measurement seemed to be best.You can experiment with how close you want your “waves” to be, but don’t make them too close or they won’t lay down well. The distance will obviously be determined partly by the measurement of the towel.
4. Once you have the grid drawn, it should look something like this.
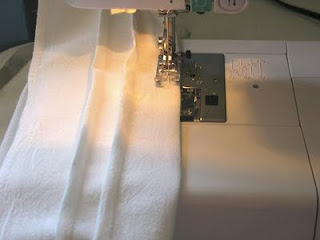
5. Fold on the long horizontal lines and sew the long tucks first. This is easy sewing. Even a beginning sewist can make these dishtowels. If you are helping a beginner, encourage them to pin the tucks so that they are sewn straight and smooth. If you are experienced, just fold the fabric along the marked lines and hold the tucks in place as you sew.
6. Press the tucks toward the hem. You can leave the tucks as is and trim the towels with a little embroidered flower or a button or an applique. Or, if you like, you can make the tucks fancier by sewing them into alternating "waves."
8. Sew vertically across the tucks, following the marked vertical lines. Alternate the direction, so that one line goes one direction and the next line pushes the tucks in the opposite direction. I put the needle down about 1/4 inch from the edge of the bottom tuck and completed the stitching at about 1/4 inch past the top one. Be sure to backstitch the ends of your stitching.
9. Stitch the edges down as well.
10. Finished tucks. You can see the pattern of alternate stitching.
11. Clip all the threads.
12. Wash the dishtowels to remove the markings and then press. Finished!
This post was shared in the Domestically Divine link-up.
This post was shared in the Domestically Divine link-up.


Ahhhhh, I can do tucks~! I've got to get some other projects finished and then I am going to try to do the crochet edges on the towels!
ReplyDeleteThese are just darling. Had to include them in my round-up of TUCKS sewing projects. Hope to make my own someday!
ReplyDeletehttp://thethinkingcloset.wordpress.com/2012/11/05/sewing-101-tucks/
Cheers,
Lauren