Showing posts with label aprons. Show all posts
Saturday, April 11, 2020
Thursday, April 2, 2020
Abigail's Apron - Green and Blue Set
I am making coordinating aprons for this kitchen set. This pretty floral apron will be Abigail's. I honestly love this pattern! It is called "Sassy Little Apron" by Cabbage Rose. My favorite feature is the contrasting bias ruffle - I love the drape! I also really like the facing feature that saves me from having to hem around such a large area - nice. I used this pattern for the apron in the Thanksgiving set also - there you can see a much younger Miss Abigail modeling this pattern.
Here is information about Cabbage Rose patterns - the CUTEST aprons!
Cabbage Rose
4598 Kilkee Drive
Redding, California 96001
cabbagerosequilts.com
Here is information about Cabbage Rose patterns - the CUTEST aprons!
Cabbage Rose
4598 Kilkee Drive
Redding, California 96001
cabbagerosequilts.com
Saturday, February 20, 2016
Sew on Saturday: Pink & Brown Floral Apron
I always plan for aprons as part of the kitchen sets that I'm making for the hope chest. But for some reason, I put off making them. I have several cute patterns and I have a hard time choosing which pattern to use. The pattern for this apron is Butterick #5263 and I like it very much. I did not use the full lining the pattern called for. Instead, I just purchased bias tape and attached it as a faced hem to finish all the edges.
I took the opportunity to show Miss Abigail how to sew a nice curve on the pocket. In case you don't know, I will mention it to you. Just make a gathering stitch along the curve and pull it up a little bit. This creates a natural curve and then you can press it before pinning the pocket to be sewn. This is much, much easier than trying to press the curve without the fabric being gathered.
Completing this apron finishes the Pink&Brown kitchen set for the hope chest. I'm off to take pictures and will post the finished set next week. I hope you'll check back.
Friday, February 12, 2016
A Peek Inside: Vintage Ric-Rac Gingham Apron
Kelly was wondering about a how-to on the pretty vintage ric-rac gingham apron shown in Miss Abigail's valentine set. She admired the vintage flair and thought it might be simple enough to make with a little direction. I didn't sew this apron, so I don't have a pattern to share. I thought I could at least take a few close up pictures and explain how I think one could re-create it.
This apron was actually a gift from one of the older ladies in the Stanley Homemaker's Club, of which Abigail and I are members. The Homemaker's Club was officially formed in 1942 as part of the old County Extension club program. We are no longer formally affiliated, but rather meet twice a month for tea and conversation. I love our "show & tell" meetings especially. Abigail was born into the club when most of the ladies were already grandmas and they spoil her flagrantly! Peggy is in her 80's now and this was once her apron, reportedly hand-made by a member of her family. It is probably between 45 to 60 years old. Gingham was especially popular in the 1950's as a domestic fabric. Aprons were often made with gingham and embellished with cross-stitch embroidery and ric-rac.
The half-apron is sewn on a machine, but the bottom hem and the ric-rac are sewn by hand. It is 35-inches wide and 20-inches long, with a deep 3-inch hem. Three rows of medium black ric-rac are offset with two rows of baby black ric-rac. You can see a tutorial of the technique used to apply the ric-rac in this tutorial I wrote about ric-rac pillowcases.
The body of the apron is not gathered to a waistband, but rather has four (.75-inch deep) pleats which narrows the waist to 20 inches. A simple rectangular facing (2.75 x 20-inches) finishes the back and creates a waistband for the apron. The pleats are about 3-inches tall. More ric-rack is applied to the waistband.
The ties measure 2.5 x 27 inches (narrowly hemmed) with the end turned up and tacked into a point. They are attached underneath the facing.
Finally, a pocket, measuring 5.5-inches wide by 5-inches deep is sewn on the right hand side of the apron. It is attached 3-inches down from the bottom of the waistband and 6.25-inches in from the right side hem. Because of the pleats, I'm sure the pocket was attached before the pleats were sewn.
I agree with Kelly - the apron is darling, and could be re-created with just a little experience with sewing. I'm so pleased that Abigail has this in her hope chest, both to remember Peggy and to dress up a little when she feels like it.
P.S. Please remember that the measurements are finished measurements. One would need to add allowances for seams and hems.
BTW - How do you think ric-rac should be spelled? Rick-rack?
Tuesday, February 21, 2012
Celery Rose Printing
I saw this interesting technique and thought how fun and easy it would be to print an apron for the hope chest. The materials are simple: an apron, fabric paint, a piece of foil to hold the paint, and the discarded bottom of a stalk of celery! You will also need wax paper or cardboard to place under the apron to protect the table surface and a paper towel to blot the paint.
The celery needs just a bit of preparation. Cut the stalk near the bottom and, if you like, clean out the leaves in the middle. It is also interesting with the leaf mass left in, but you can decide which you prefer. Cut the celery straight across, so that the stalks stamp evenly. You can see that we have a rubber band around the stalks. This is just a precaution in case a stalk breaks off.
Squeeze some paint onto the foil and spread it a bit. Dip the celery into the paint, covering all the cut surfaces of the stalk. If the paint seems goopy, blot the excess onto the paper towel. Then press the paint onto the apron.
Pick up a second color and make a second print, next to the first and then a third print. If you like, you can keep the colors separate, or try mixing them. A mix of colors gives a little bit of dimension or depth to the design.
Celery stalks can be variable, obviously. If there are spots that seem bare or too open, use just one piece of celery to add petals wherever you think they need to be.
Use one piece of celery with the green paint to add leaf shapes to the design.
Happily, Abigail has learned the design principle of thinking in terms of a triangle. I was pleased that she used three flowers in a triangular shape and placed the leaves also into a triangle. Not that the triangle is the only way to design, but it is a pleasing composition, and easy for children to understand.
Tuesday, November 22, 2011
Thanksgiving Kitchen Set
I finished the Thanksgiving kitchen set for Miss Abigail’s hope chest - just in time! I always seem to run a little behind on my projects, but this one is ready. Thanksgiving is one of our favorite holidays. I love to cook the dinner and Abigail loves to decorate and set the table, so we make quite a team. I even like to wash the dishes, which I do mostly by myself - at my own request. I just like to take my time and admire my pretty dishes and dry them off with pretty towels. I’m not sure that Abigail will ever love to do the Thanksgiving dishes, but at least she will have the pretty towels.
I started this set with the yarn that Abigail liked so well. These hotpads are truly one of a kind. I wanted something different from my usual favorite, so I loosely followed a hexagonal pattern. The term loose would be an understatement. I got a little creative in the middle of things and then somehow had to make it all work together. I wrestled and wrangled and, in the end, these hotpads turned out pretty well, but I’ll never be able to replicate what I did. They are nice and thick, which is the most important factor.
I tried a circular pattern for the dishcloths in this set. These were quick to make, and I’m happy to have another quick pattern. I started out with the #1 pattern found in a Leisure Arts leaflet called "Dishcloths in the Round," but naturally adjusted here and there. I really can't seem to help it. The V-stitch works well for dishcloths, I think. This stitch makes a fabric that is close, but not too dense.
I used two designs from Aunt Martha’s #3995 “Monthly Madness” for the embroidered dishtowels. I loved the designs, but thought they were a bit small, so I enlarged them on a regular copy machine and then traced them with a transfer pen.
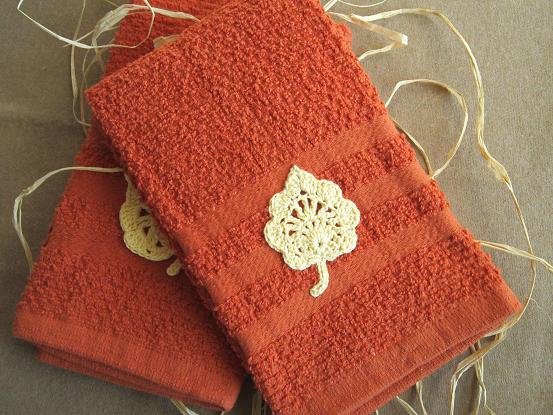
I found a nice color match in these handtowels and added a simple crocheted leaf to the bottom of each towel. The pattern for this scallop-edged leaf comes directly and without deviation from a lovely book, “Crochet Bouquet,” by Suzann Thompson. I used #3 sized cotton thread.
The pattern for the apron is the “Sassy Little Apron” by Cabbage Rose Quilts. Cute.
The last item in this set is another fabric embellished dishtowel. I had extra fabric from the apron and quickly sewed up a towel using the “Retro-Fun” tutorial from Sew4Home. This is a great tutorial. I think I’ve found another dishtowel favorite. I added a simple monogram with chain stitch and lazy daisies.
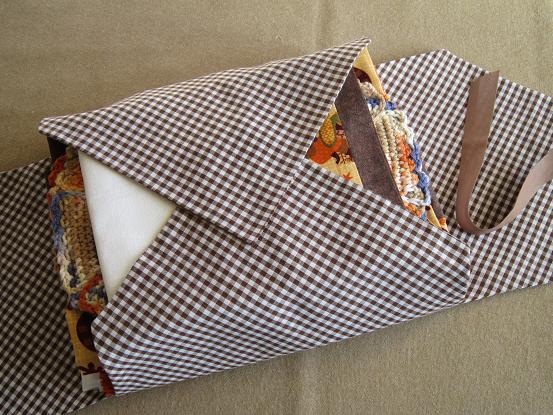
Finally, I made a cover to keep the items together inside the hope chest and then made a tag from the apron fabric to identify this set.
Happy Thanksgiving! I hope you all have a wonderful holiday.
Subscribe to:
Posts (Atom)