Showing posts with label crochet. Show all posts

Friday, April 17, 2020

"Granny Round" Soup Mats


Miss Abigail loves a party! She has always loved socializing with people and that often involves food.  I know she will want to host casual get-togethers with friends and have another couple over for dinner occasionally. So I've been thinking about what she might need in her linen closet to plan for a special occasion. I've been thinking about a game night or a movie night or a casual picnic at the trail head - even snacks for finals week.

I mentioned before that I had not created many table linens for the hope chest because we didn't know very early in this process what her dishes would look like. But now we do, so the gap in table linens looms large in the unfinished projects category.

I thought these small place mats might work for an easy winter soup party or a summer pasta party, a mini salad bar potluck or snacks for a game night. They don't take up much room at the table, but they still give a bit of a finished look. I made four, thinking she might be hosting a second couple for dinner or a couple of girlfriends in a study group. A tablecloth would be an easier choice if there is a larger crowd around the table.

I began with my pattern for the simple granny round dishcloth, but changed the pattern to make it larger with an additional row. Here is the new pattern if you want to make these mats for yourself. I will post a photo tutorial tomorrow for those who might need some visual help. I will remind everyone of the copyright notice in the sidebar and ask that you don't sell or steal this pattern. Thanks!

Granny Round Soup Mat

Size: 10-inch diameter
Materials: Worsted weight cotton yarn, Size G crochet hook

Row 1: Make a magic circle to form ring. Ch 2 (counts as first sc). Make 13 sc in ring. Join with sl st to top of chain 2. (14 sc)
Row 2: Ch 4 (counts as first dc + ch 1). Dc in next sc. Ch 1. (Dc, ch 1) in each sc stitch around. Join with sl st in third chain of beginning stitch. 14 dc.
Row 3: Ch 3. Dc in space below. Ch 1. (2 dc, ch 1) in each ch 1 space around. Join with sl st in top of beginning ch 3. Sl st in next stitch and in the ch 1 space. 14 pairs of dc.
Row 4:  Ch 3. 2 dc in space right below and to the right of the chain 3. Ch 1. Put (3 dc, ch 1) in each ch 1 space around. Join with sl st in top of beginning ch 3.
Row 5: Ch 3. Dc in next 2 dc. Ch 1. Dc in ch 1 space. *Dc in next 3 dc. Ch 1. Dc in ch 1 space.* Repeat between ** around. Join with sl st to top of beginning ch 3. 56 dc.
Row 6: Ch 3. Dc in same stitch as joining. Ch 1. Make 2 dc in next ch 1 space. Ch 2. *skip next 2 stitches. 1 dc in next stitch. Ch 2. 2 dc in next space. Ch 2.* Repeat between ** around. Join with sl st in top of beginning ch 3. Sl st in next stitch and in space.
Row 7: Ch 3. 2 dc in space below. Ch 1. *(3 dc, ch 1) in next ch 2 space.* Repeat between ** around. Join with sl st in top of beginning ch 3.
Row 8: Ch 4. 3 dc in next ch 1 space. Ch1. *(3 dc, ch 1) in next ch 1 space.* Repeat between ** around to the last space. Put 2 dc in last space and join with a sl st in the 3 chain of the beg chain 4.
Row 9: Sl st in next stitch. *5 dc in ch 1 space. Skip next dc. Sl stitch in next dc.* Repeat between ** around. Join with a sl st in beginning sl st. Fasten off. Weave in ends.


Friday, September 2, 2016

Friday Freebie: Felted Crocheted Mug Rug


I'm giving away my secrets over on our Hyer Wools website today. I've been busy again, working on wooly items for our 2016 Heart of New Mexico Fiber Gathering. The festival begins tomorrow! But I did take the time to create a tutorial for this cute mug rug and I decided to teach the world how to make one, if you're interested. It's easier than you might think, but you do have to use 100% pure, untreated wool yarn for this project. Just slip over to Hyer Wools for the photo tutorial and pattern. And if you pin it from our blog over there - I'd consider it a favor! Thanks.

Tuesday, April 12, 2016

Pattern: Crocheted Rose Scarf Slide


I'm experimenting with patterns for crocheted flowers and thought I would share this one. While I don't have time to make a tutorial, I can share the pattern for this pretty gathered rose. Those of you with some crochet experience will find it pretty easy. A number of patterns for this kind of "rolled" crocheted rose are all over the internet. Here is one to add to the mix. I've also included the directions for how to make a chained back to turn this project into a scarf slider, but you could leave that off and use the crocheted rose for any kind of embellishment from hats to headbands to hair clips, pins and even tote bags. Just use your imagination.


Crocheted Rose Scarf Slider

worsted weight yarn (I used a lovely acrylic/wool blend)
size "I" hook

Note: After the first row, and again after the second row, the crochet will begin to twist a little from the increase in stitches. Just let that happen naturally. It is this twist that allows the rose to gather around itself and form the petals.

Foundation: Chain 34. Turn.

Row 1: Make 2dc in the 4th chain from the hook. (ch-3 counts as dc) Skip next chain. *(3 dc in next chain, skip next ch). Repeat from * across the foundation chain, ending with the 3dc group in the last chain. Chain 2 and turn.

Row 2: Put a dc in first dc stitch, 2 dc in next dc stitch, dc in next dc stitch. Ch 2, sc in ch-1 space, ch 2. ** (dc in next stitch, 2 dc in next stitch, dc in next stitch. Ch 2, sc in ch-1 space, ch 2. Repeat from ** across to the last three stitches. Dc in next stitch, 2 dc in next stitch, dc in last stitch (which is the original ch-3). Ch 2 and slip stitch at bottom of the last stitch. Leave a 6-inch tail and fasten off.

Finishing: Use a yarn needle and thread on the tail. Weave the yarn tail through the foundation chain across to the opposite end. Twist and roll while gathering up the tail to form the rose. Arrange the petals and then use the remaining yarn tail to tack the crocheted rose petals gently and securely in place. Fasten off and weave in the yarn ends.

Slider back: Leaving a 4-inch yarn tail (on both ends) chain 12. With the loop on the hook, attach the chain to the back of the crocheted rose with a single crochet stitch. Turn and slip stitch along the chain to the other end. Fasten off. Use the yarn ends to fasten the loose end of the chain slider to the crocheted rose opposite it's other end. Weave in and clip any remaining yarn ends.


Tuesday, March 8, 2016

Tutorial: Scalloped Net Crochet Edging


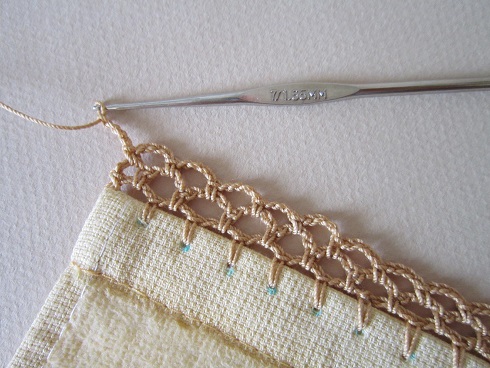
I especially like this scalloped net crochet edging for a kitchen hand towel. It has become one of my go-to edgings because it looks a little bit fancy, but is still quite easy and quick. This simple pattern makes a very nice edge on a pillowcase as well.

Materials:
Kitchen towel
#10 size crochet cotton (I used DMC Cebelia for this project)
Size 7 (1.65 mm) steel crochet hook (USA)
Tapestry needle

Begin by marking the foundation on the towel. This edging has 5 rows, an odd number, so you can mark and begin with the right side of the towel facing you. I usually put the marks 3/8-inch apart. I made a simple cardboard template to help me mark. It is much easier to see than a ruler. Use a marking pen with removable or disappearing ink. You will want to have an even number of spaces across the towel. Depending on the total width of the piece, you may need to adjust the width of the spaces so that you come out even.


Push a hole through the edge of the towel with an embroiderer's awl. Push the awl through the holes and keep ahead of your crochet about 6 or 7 holes. If you make too many hole at once, they will just close before you can get to them. No use wasting your time. If your towel has a looser weave in the hem, you may not have to use an awl. Sometimes you can just push the hook through the fabric at the mark. There are also special "sharpened" crochet hooks that you can use to pierce the fabric as well. Since I have an awl, I use it.


Foundation Row: Cast on in the first mark at the right side and chain 3. Put a (sc, ch 4) in each hole across the front of the towel, ending with a sc in the last mark at the left edge of the towel. Chain 2 and turn.


Row 1: Sc in the first ch-4 space. Ch 4. (Sc, ch 4) in each ch-4 space across, ending with a sc in the last ch-4 space. Chain 3 and sc in the cast on stitch. Chain 2 and turn.


Row 2: Sc in the first ch-3 space, ch 4. (Sc, ch 4) in each ch-4 space across, ending with a sc in the last ch-2 space. Ch 2 and turn.


Row 3: Sc in first ch-2 space. Ch 4. (Sc, ch 4) in each ch-4 space across, ending with a sc in the last ch-2 space. Ch 2 and turn.


Row 4: Sc in the first ch-4 space. *Make 7 dc in the next ch-4 space. Sc in the next space. Repeat from * across to the last ch-2 space. Sc in this last space and fasten off.


Weave in the ends. I use a tapestry needle to weave down the stitches of the end rows.


At the bottom of the stitches I push the needle into the towel and along the hem of the towel for about four to six inches and then bring the thread up out of the towel.


Then I pull it a little to create some tension and clip the thread so that it pulls back into the hem of the towel. This creates a "lost thread" in the hem and I don't have to worry about it.


 The finished edging is pretty don't you think?


If you like this edging, you may also like my "Posies Edging" tutorial. Posies is also scalloped, but the scallops are smaller and more shallow. The overall look is a bit more blocky.

Monday, January 18, 2016

Monday Minute: Quick Gift Idea


Well, just because I have such easy access to the Internet now, I wanted to show you how I finished out the ball of Crafter's Secret yarn that I reviewed a few days ago. I crocheted another quick dish scrubby (tutorial here) using the most recent pattern to add to the crocheted dishcloth. You can see that there is just a bit of yarn left. I love a project that uses up all the yarn without having too much leftover! I think I will add this set to my own kitchen drawer. Or, if I take a moment to sew a simple fabric border dishtowel (tutorial here) to expand the set, I will have a lovely gift for a bridal shower. You know it's always nice to have a quick gift on hand.

Friday, January 8, 2016

Tutorial: Ruffly Dish Scrubby


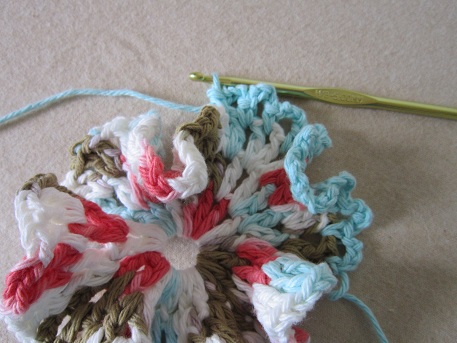
I really like the vintage dish scrubby that I posted about here. However, that pattern calls for thread and is so ruffly that the scrubby has a hard time drying. If you try to make the pattern with a worsted weight cotton yarn, you'll end up with a HUGE problem. (See this funny post on a website called Pinstrosity!) [edit--and this one in response to this post-km] I still like the idea of the ruffly scrubby so I rewrote the pattern to better fit the more common thicker yarn. The scrubby is a little less ruffly than the original but still cute and, more importantly, better able to dry out before mildew sets in. I have made a number of these now and enjoy using them. I think they are just the right size. Just hang the scrubby over the faucet to dry.


Materials: worsted weight cotton yarn (such as Peaches and Cream) and a size "H" hook. I used two colors, but you can use just one if you wish.You can see that I've used all the leftover bits from the crocheted dishcloths made for the Retro Set.


Chain 8 and join with a slip stitch to form a ring.


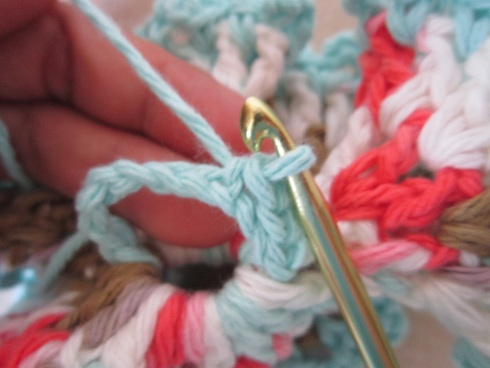
Round 1: Ch 3. (counts as first dc now and throughout) Make (dc, ch 1) 21 times in the ring. Join with a slip stitch in top of ch 3 at beginning of round. You should have 22 dc and 22 ch-1 spaces.


Round 2: Chain 3. Make (dc, ch 1) in the first ch-1 space. (this is the space between the beginning ch-3 and the next dc stitch). (Dc, ch 1, dc, ch 1) in each ch-1 space around. Join with a slip stitch in top of ch-3 at beginning of round. (44 dc) and (44 ch-1 spaces)


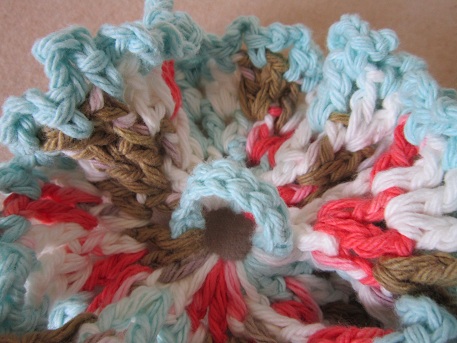
Because you are doubling the number of stitch groups you put into the spaces, you are beginning to see a bit of ruffling in the fabric. That's just what you want!


Round 3: Ch 3. (dc, ch 1) in first ch-1 space. (Dc, ch 1, dc, ch 1) in each ch-1 space around. Join with slip stitch in top of ch-3 at beginning of round. You should finish this round with 88 dc and 88 ch-1 spaces. Fasten off with  this color and weave in the ends. In this picture you can more clearly see the ch-3 "rise" at the beginning of the round. This ch-3 is the partner to the single dc in the first space. Every other space in the round should have a (dc, ch-1, dc, ch-1) group of stitches.


Each round doubles the number of stitches, creating the cute ruffly effect. It might get a little awkward as the yarn starts to fill up your hand. Just keep pushing it all to the side and keep going.


Edging Round: Cast on in any ch-1 space with the contrasting color and chain 4.*sc in the next ch-1 space. Ch 4. Repeat from * all around. (88 sc and 88 ch-4). Join with a slip stitch in the bottom of the beginning chain 4. Fasten off.


Hanger: Attach the contrasting colored yarn to original loop between stitches. Chain 9.


Join with a slip stitch around the original loop (between the stitches) on the opposite of the hole.


Turn and slip stitch in each chain of the hanger, reinforcing along the length. Fasten off. Tie the ends and then weave them in. Finished.


Here is the pattern without the tutorial breaks.

Ruffly Dish Scrubby
Materials: worsted weight cotton yarn (such as Peaches and Cream) and a size "H" hook

Chain 8 and join with a slip stitch to form a ring.
Round 1: Ch 3. (counts as first dc now and throughout) Make (dc, ch 1) 21 times in the ring. Join with a slip stitch in top of ch 3 at beg. of round. 22 dc and 22 ch-1 sp.
Round 2: Ch 3. (dc, ch 1) in the first ch-1 space. Make (dc, ch 1, dc, ch 1) in each ch-1 space around. Join with a slip stitch in top of ch-3 at beg. of round. 44 dc and 44 ch-1 sp.
Round 3: Ch 3. (dc, ch 1) in first ch-1 space. Make (dc, ch 1, dc, ch 1) in each ch-1 space around. Join with slip stitch in top of ch-3 at beginning of round. 88 dc and 88 ch-1 sp. Fasten off with  this color and weave in the ends.
Edging Round: Cast on in any ch-1 space with the contrasting color and chain 4.*sc in the next ch-1 space. Ch 4. Repeat from * all around. (88 sc and 88 ch-4). Join with a slip stitch in the bottom of the beginning chain 4. Fasten off.
Hanger: Attach the contrasting colored yarn to original loop between stitches. Chain 9. Join with a slip stitch around the original loop (between the stitches) on the opposite of the hole. Turn and slip stitch in each chain of the hanger, reinforcing along the length. Fasten off. Tie the ends and weave in.


Saturday, August 29, 2015

Sunflower Hand Towels


Before August is over I wanted to show a picture of these towels. We live down a dirt road way out in the county and the sunflowers are just lovely every year in late August. This year we've had more rain than usual and the sunflowers are blooming like there is no tomorrow. I love them. I have made these towels for the hope chest so that Abigail could be reminded of sunflowers and home. I put a fancy edging on one end of the towel and a simpler edging on the other end. I like both colors together.


Tuesday, July 21, 2015

Tutorial: Granny Square Edging

I want to show you the simple edging I've been using on my granny square dishcloths. This first picture shows the completed granny square. This pattern is Abigail's 4H granny square dishcloth, with a couple of rows of contrast colored yarn included in it. End the square and weave in the ends.


Attach contrasting colored yarn in any corner and chain three.


Put 2 dc in the corner space immediately below the ch-3.


Put a sc in the next space.


Chain 3.


In the same space, put 2 dc.


Sc in the next space.


Ch 3, 2 dc in same space. Continue across the side putting (sc, ch 3, 2 dc) in each space until you reach the corner space.


Sc in the corner space.


2 dc, ch 2, 3 dc in the same corner space.


Continue around the edge of the dishcloth, putting (sc, ch 3, 2 dc) in each space and (sc, 2 dc, ch 2, 3 dc) in each corner space. When you reach the last (technically the first) corner, put (sc, 2 dc, ch 2) in that space. Finish off with a slip stitch in the top of the original ch-3. Fasten off and weave in the ends.


That's it!
Related Posts Plugin for WordPress, Blogger...