Showing posts with label kitchen linens. Show all posts

Tuesday, February 13, 2018

Valentines Towels

I'm adding these two hand towels to the Valentines kitchen set in Miss Abigail's hope chest. The colors were super hard to photograph, but the towels are quite beautiful.

I ran into the toile print cotton fabric some time ago and it called to me, so this towel is hand sewn and decorated with the embroidered rick rack trim. The dark red plaid is a Dunroven House towel and I just used a simple running stitch to embellish it a bit. Here are a couple of close pictures.
 You might remember that this towel also has the dotted rick rack technique applied.

I used a thicker perle cotton thread for the lighter stitches and it has a more raised impression than the darker, six strand embroidery cotton, which lays more flat. I like how that turned out.


If you're interested this post describes what is currently packed away in the hope chest for celebrating Valentines Day.

Thursday, May 7, 2015

A Peek Inside: Aunt Bertha's Kitchen Set


Will there be items in her hope chest that Miss Abigail will never use? Probably.

I have a large and loving family. There were six aunts that lived close by as I grew up. These aunts were wonderful models of homemaking skills and I learned a lot from each of them. Three of the aunts are still living and are very elderly. Around the time of my birthday, a few years ago now, I picked up a package in the mail. It was from my Aunt Bertha. Inside the package were these wonderful hotpads and the embellished dishtowel, along with a note that told me how much she loved me and appreciated all of our shared experiences.

My Aunt Bertha is a very talented woman and I've never been able to use the gift as she intended that I should. I will perhaps one day, but in the meantime, I just like to get them out and look at them and remember my lovely aunt. There are a couple of things that I made for my own hope chest that I never used. I get as much pleasure out of their prettiness and the effort it took to make them as I would in using them. But even as I say that, I hope that Miss Abigail will use the things I am making. I'm making LOTS, just to ensure that she will have enough to use. There are enough that some could be gifted as my sweet aunt did, and some leftover for grandchildren. I'm sure that there will be things that Abigail will only bring out for special occasions and maybe one of two that she will just save to look at. But I hope she will use and reuse and wear out most of her hope chest.

One of my favorite activities, on a lazy afternoon, is to go to antique stores and poke around. I am always drawn to the linens. There are piles of wonderful hand crafted linens to sort through. I always wonder about why they were made and love to guess whether the crafter made them for a hope chest. I like to see signs of them being used. I think it sad when I come upon a perfect, unused pair of pillowcases or tablecloth or monogrammed napkins. There is such a lot of work involved to have the item remain unused and stored away in the dark of a chest or drawer.

Do any of you have items that you acquired for your home and yet have never used? Do you think it a shame, as I do? When do we reach the point of allowing ourselves to use our beautiful things? I really do try and hope you do as well.

BTW, the dishtowel is embellished with a simple fabric border along with the pretty peaches iron-on transfer. My aunt also used the ever-popular single-crochet diagonal pattern for the hot pads. Just google it (single-crochet diagonal hot pads) for lots of directions and tutorials.

Wednesday, August 27, 2014

Tutorial - Scalloped Ticking Stripe Hand Towel


This is an example of a hand towel made from 100% cotton "ticking stripe" fabric. I have almost finished what I am calling the "peachy/green" kitchen set and a set of two of these hand towels are part of that set. One yard of ticking fabric, along with 1/4 yard of a matching cotton print for the facing, made two towels.


The first step was to pre-shrink both fabrics and cut the towels to size. My towels were cut 20 inches in width by 28 inches in length. I used a large manilla envelope like a t-square and drew a line across the bottom of both ends of the towel to square them up.

Then I used a scrapbooking design tool draw a scalloped edge along the line at both ends of the towel. To make the scallops even I began with the center of a scallop in the middle of the towel. If you want to do the math to adjust the size of the scallops and make them come out even on the edges you may do so, I just made the scallops on the edges a little bigger to take up any extra space.


Next, I turned and pressed the side edges to make a 1/2-inch hem along the sides of the towel.


I cut four facing strips from the printed fabric that were 2 3/4-inches deep and the width of the towel. I turned and pressed a 1/2-inch hem across the long edge of each strip. I placed the facing, with right sides together, matching the bottom edge of the towel and pinned.

I used the innermost pressed line of the towel side hem as a guide and sewed down the side of the hem facing and then followed the penciled lines to sew around the scallops across the bottom of the towel. I finished with the far side edge.


I trimmed the seam and clipped the curves and points.


I turned the faced hem and carefully pressed the scallops, tucking under the side hems and pinning across the top edge of the hem.


Then I sewed the hem closed, keeping as close to the edge as possible.


I pressed again and repeated the process on the other end. The towel is finished.


Friday, August 8, 2014

Fabric for Kitchen Linens


I recently had an e-mail question about what kinds of fabric make good kitchen linens. This reader was interested in saving some money by sewing and decorating her own kitchen towels. I think this is a great question and thought perhaps more than she is interested in the subject.

The picture shows my favorite fabrics for making towels and other kitchen linens.

1. This is a soft "ticking" fabric. It is 100% cotton and usually 45 inches wide, sometimes 60 inches. It is called ticking because the twill weave and stripe pattern is typical of what is called pillow ticking - the fabric that used to cover pillows. There is a stiffer ticking - more like canvas, but you want to find the softer, towel-like fabric. I like to make kitchen hand towels from ticking and it works also for aprons. You can find ticking in the utility fabrics section of the store.

2. This is a plain weave fabric from the section of the fabric store called the "bottom weights." This is the fabric that is meant for making pants and skirts and other "bottom" garments. There are a number of choices for hand towels and aprons in the bottom weight section, but you want to be sure to look for 100% cotton fabric (or linen - but that would defeat the money savings wouldn't it!) The fabric could be either a plain weave or a twill weave - either one would work. Bottom weight fabric would also make nice place mats, napkins, or a small tablecloth.

3. Flannel makes a great kitchen hand towel. I like to sew two panels together to make it thick enough and then quilt or otherwise stitch it to hold it together. I like the many patterns and prints now available! Diaper flannel (if you can find it) and quilters flannel are sometimes a little thicker than regular flannel. The more you wash flannel, the better it gets. Flannel also works for dishcloths.

4. This is a piece of diaper fabric. You can buy diaper flannel, but diaper fabric is woven in a "birds eye" weave. It is 100% cotton and is 36 inches wide. Diapers, even the ones you buy already made (get the open, flat kind, NOT the pre folded ones) are truly wonderful dishtowels! I had a set in my own hope chest, painted with liquid embroidery by my cousin.

5. Monks Cloth is a thick, 100% cotton plain weave fabric that is usually 60 inches wide. The weave is very large and looks like huge cross stitch fabric. You can cross stitch on it and the pattern develops quickly! I also like to do Swedish Weaving on this fabric. It makes a very nice kitchen hand towel and maybe dishcloths as well. It would make a nice table cloth or place mats with cross-stitching.

6. This is a 100% cotton "waffle weave" fabric, sometimes called waffle weave muslin. It is also 60 inches wide. I love this fabric for making dishtowels and dishcloths, but you have to preshrink it even before measuring it as it shrinks so much. Just plan for that. It is a wonderfully thirsty fabric and lends itself to several kinds of decorating. You can see one example of hand made dishtowels here and another one here. The first link doesn't mention preshrinking. I certainly would do that first! Waffle weave fabric is found in the utility fabric section of the store, along with the muslin and ticking.

7. This is 100% cotton fabric called "homespun." This fabric makes really great dishtowels! I have several in my own kitchen drawer. Just be sure to get 100% cotton. You can find homespun with the quilting cottons in the fabric store. I have made this and this set for the hope chest so far.

8. These are two plain weave 100% cotton prints that I found in the "home dec" section of the fabric store. This fabric is often labeled dry clean only, but I use it for hand towels and aprons and place mats, napkins and tablecloths. I don't dry clean them. I usually just wash them on warm and dry on the clothesline. I understand that the fabric is labeled thus because the manufacturing is so variable that it might shrink (a lot or unevenly!) or it might "crock" (which means that heavily dyed fabric transfers excess dye to other fabric), or fade or exhibit any number of other problems. So I just take a chance because there are some wonderful choices in this section. I have never had any problems, but that doesn't mean you won't... When I make things for the hope chest, I try to always pre-wash and pre-shrink - so that fifteen years from now Abigail doesn't get a nasty surprise when she does laundry.

9. This is 100% cotton terry cloth. The width varies, usually 45 or 60 inches wide. It could used for hand towels and dishcloths. A pretty cotton print bias edging looks very pretty.

10. This fabric is called "huck" toweling or huckaback. It is narrow, usually only 15 inches wide and the edges are finished with a selvage. Huck toweling has a distinctive vertical raised thread in the weave and is most often used for Swedish Weaving decoration and other embroidery. It is soft and absorbent and makes a nice kitchen towel or tray cloth.

There is one more fabric that I use for dishtowels, but I didn't have any to put in the picture. Osnaburg fabric is found with the rest of the muslins in the fabric store and is a little bit thicker than regular muslin. It is more like homespun and it makes great dishtowels. It is 100% cotton, usually 45 or 60 inches wide and comes mainly in a natural darkish tan color. Osnaburg is a plain weave, so it frays nicely and it takes embroidery really well. It needs to be washed a couple of times before it is nicely absorbent.

Speaking of muslin, I have read that some people make dishtowels from muslin. I keep meaning to try - it is very inexpensive and would lend itself to many decorative techniques. When I look at it, though, it seems to be woven so tightly that I can't imagine that it would be very absorbent. Maybe someone has experience with it...

Just a quick comment about price. Sometimes new fabric can be more expensive than just looking for a good deal on ready-made linens. I always watch for the sales or use a 40% coupon to get the best deal, and usually have a stack of "hope chest" fabric in a stash, waiting for the next creative project!

Wednesday, December 18, 2013

Stenciled Snowflake Dishtowel


Just thought I would show you my recent, very last minute gift idea. I needed wrapping for a gift for a cook.  I had purchased a specialty snowflake cake pan but wanted to add a handmade touch as well. I thought a stenciled dishtowel would fit both requirements nicely. I always have blank dishtowels handy! I first used Tulip spray fabric paint to spritz a blue blizzard in the background. Then I used a thin plastic snowflake stencil and  a couple of different colors of Tulip soft fabric paint to stenciled several snowflakes around the edges and in the corners of the dishtowel. This fabric paint dries very quickly and I was able to wrap the gift after just four hours. Now I think I want to do a snowflake set for the hope chest!


Friday, November 1, 2013

"Blessing Towels"


The day after my last post, I went into the hospital for a surgery to correct an injury to my ankle. Thankfully, after four weeks, I am finally able to put weight on my foot and walk again. Maybe I should say that I am able to move on my own since I still have some work to do before I can call this walking. Still, I am so grateful to be moving without crutches. The Lord is gracious unto me!

Because of the surgery, I've had some down time to do hand work for the hope chest. I finished up the last items for the brown/aqua "Kitchen Utensils" set. Actually, I still need to sew the apron, but alas, not until I can use the foot pedal on the sewing machine again. I've been calling these hand towels the "Blessing Towels." The blessing comes from the Bible, specifically Numbers 6:24-26. I love this blessing and wanted to pass it on to Miss Abigail. A friend of mine saw these towels in TJMaxx and I was so pleased that she snapped them up. The color is perfect and there is a plain weave space amid the waffle weave that is just perfect for cross stitch. I didn't want to put too much cross stitch work into kitchen towels and this alphabet was simple and quick. I really like how the towels turned out.


Saturday, September 21, 2013

New Items for the Hope Chest


I haven't had much time to blog lately, but I have still been hard at work on the hope chest. I finished this set of three Tunisian crocheted dishcloths for what I think of as the "Kitchen Utensils" set. (tutorial here)  I also added this set of four brown-toned hand towels and a second set of dishcloths with a simple scalloped shell edging.


I painted a set of dishtowels as well, using the old fashioned tube paints. I remember these paints as being quite easy to use, but I think I need a little more practice.

I have a list of items that I want to include with this "Kitchen Utensils" set and I am now finished with all but a couple of the projects. Soon I can sew up the apron and a bag of some sort to keep it all together in the hope chest. I'll try to get pictures taken and posted soon. Promises, promises...

Thursday, October 4, 2012

Stenciled Dish Towel


You see a lot of stenciling on the blog because it is so easy and quick to do and I think the results are so fun! I made a set of dishtowels recently to include in a wedding gift and I thought I would show you how I did it. Miss Abigail wrote a more basic tutorial on stenciling for beginners, if you need to see the actual technique.


Start by washing and drying the dishtowel. This removes any sizing or starch from the towel and allows the paint to penetrate into the fibers of the cloth. If you skip this step, the paint will likely fade much faster. Place a piece of cardboard or tin foil beneath the dishtowel, to prevent the paint from soaking through to the table. I use the Tulip soft fabric paint and whatever stencil strikes my fancy.


Use a just barely damp sea sponge and dab it lightly into green fabric paint. Lightly dab the sponge onto the towel to create a foliage background for the flowers that will come on top.


Add just a tiny bit of darker green to give the background some dimension. Use just a tiny bit!


Use the stencil to add flowers and leaves in a design across the foliage background. I blended two tints of the same shade while the paint was still wet to give the flowers a little dimension as well. I also added just a few dabs of a purple color between the flowers. Let this much dry. The directions for the fabric paint will give you the proper length of time.


After the flowers were dry, I stenciled smaller flower "centers" on top of the main flowers. I also used the end of the paintbrush, dipped in the paint and a very tiny brush to add further details and highlights to the flowers. Finally, I used another stencil with two colors to add the word.


Stenciling is really not hard to do and it makes me feel so artistic! So many projects for the hope chest can be stenciled. Dishtowels, of course, and pillowcases -you just need to be creative.

Tuesday, April 24, 2012

Color Strategy for Kitchen Linens

Crochet brightens up the edge of these pretty handtowels in the "Sunflowers" set.
My strategy for hope chest kitchen linens is a little different. We may wish to do something other than timeless or classic, and I think one can be a little wilder with her dishtowels than, say, a bed quilt. There are so many appealing paths to follow with fun kitchen themes and cheerful colors. So, for me, any color goes when it comes to a kitchen towel. These linens get so much use that they are likely worn out before you could ever change your mind or get tired of them. Miss Abigail and I have several themes and colors going on for her hope chest kitchen linens and even some sub-sets within sets. Many of these colors overlap and items could fit into several different sets. Some sets are started and some are merely planned. Most of our sets start with a piece of fabric for an apron. But some have begun because of a cute towel, like the sunflower towels shown above, or an appealing skein of yarn.

This was the first fabric I purchased for a kitchen set. Abigail and I have been working on things for this "Floral" set for quite some time. Green is my favorite color and I love florals. Abigail has always loved red and pink. Yellow is a strong color in this set also and there is just a bit of plummy purple as an accent. Okay, I have to admit that I picked this fabric because I liked it. Abigail is not strong on florals right now, but I'm counting on changing her mind one day.


Miss Abigail says her favorite color is blue (at the moment) so this next fabric answers that. Yellow, green and white expand the possibilities. The fabric is actually much brighter and more cheerful than this picture shows. Abigail has made a number of items to go into this set. We have a set of "daisy" printed hand towels that match this fabric, so daisies are a sub-set of this "Plaid" set.


Miss Abigail has grown up on a homestead, and I want her to take "Country Memories" with her when she leaves home. So, naturally I'm working on a denim and rusty red country theme set. Straw yellow and mossy green colors overlap both of the previous sets as well.


Miss Abigail has always liked pink too. Hmm, another floral. I sure hope she changes her mind about that. I guess, if she really hates it later, we can do a fabulous giveaway! I like the colors "Pink and Brown" together.


Finally, a really pretty aqua, turquoise and brown fabric. I love these "Kitchen Utensils!" Since Abigail loves to wear these colors, I knew she would like them in the hope chest.


We have a couple of other themed sets, as well - a red, white and black "ladybug" set, the "sunflowers" set (because I saw those cute sunflower hand towels!) and a "garden" set. And, of course we couldn't leave out all of the holidays... (sigh) My husband thinks we're running a hope chest factory! He says Abigail will need a hope chest U-Haul and heaves a big sigh of sympathy for her long-suffering future husband. I know it seems like I'm carried away by all of this kitchen stuff. But, in the end, whatever is excessive will be passed on to others as gifts. I have neices, and friends, and there are always grandchildren. No worries! Right!?!

Monday, February 27, 2012

Fabric Printing Demonstration


As part of her 4H project work, Miss Abigail gave a demonstration of celery rose printing in a recent meeting of the Stanley Homemakers Club. I think the ladies enjoyed it. I just wanted to show how creative one can be with this technique. After her demonstration, Abigail invited the ladies to try printing with celery on a plain white dishtowel. You can see that each of the ladies who made a dishtowel were somewhat unique in their interpretation.


I made a towel to match the one Abigail made, so that she would have a set for the hope chest.


Saturday, December 10, 2011

Christmas Filet Crochet


Filet crochet is a method of forming picture designs with regular crochet stitches worked in solid blocks and open spaces. Filet crochet is a lovely technique and it’s easy to learn. Filet pieces are very appropriate in a hope chest. You could make framed pictures or wall hangings, pillows, table runners and toppers, doilies, coasters, edgings for all kinds of linens, and even window curtains. I want to show you how to make a small patch that I recently applied to a Christmas hand towel. I hope you’ll give this a try.

Traditional filet is a style of thread crochet and uses a steel hook with fine cotton thread. On this piece, I’ve used a size 9 steel hook and size 10 cotton thread. The simplest designs are made with the chain stitch and the double crochet stitch. Rather than written, row by row instructions, filet crochet is worked from a printed chart of blank spaces and solid squares. I’ve included four simple Christmas chart designs as a JPG image that you can print. Look for the pattern at the end of the post.

The dark gray squares of the chart indicate a filled square, the blank spaces are open blocks. An open block of filet crochet is made with a double crochet, chain-2 and a double crochet. A filled block is made with four double crochets. Each block shares a stitch with neighboring blocks.You’ll probably want to include at least one or two spaces of open rows around the edge of the design.

With any filet pattern, to find the number of chain stitches for the foundation row, count the squares at the widest part of the design, including any border squares. Each of the designs I’ve charted have a count of 11, including a border row all around. Multiply that number by 3 (33). When working from filet charts, if the first block of a row is an open block, you add 6 to the total number of chains and work the first double crochet into the 9th chain from the hook. If the first block is a filled square, you add 4 to the total and work the first double crochet into the 5th chain from the hook. These designs have an open block at the beginning of the foundation row. 6 added to 33 equals 39.


Chain 39 and put the first double crochet into the 9th chain from the hook. * Chain 2. Skip the next 2 chains. Double crochet in the next chain. Repeat from * across to the end, with a double crochet in the final chain. This makes a row of 11 empty blocks, our first border row.

Before we leave this initial row, I need to tell you something more about working from charts. Each odd numbered row is read and worked from the right side to the left. You just follow the picture. But when you turn to do the even rows, you are working from the back side, which means that you need to read and follow the chart from the left side to the right. The picture won’t turn out right unless you are careful to make the odd rows right to left and the even rows left to right. I’m using the snowman chart for this tutorial, partly because it is exactly the same both ways. It will turn out right, even if you get mixed up.


Because the second row begins with an empty block, chain 5 and turn. Double crochet in the top of the next double crochet. Chain 2. Double crochet in the top of the next double crochet. This creates two empty blocks, which is what the chart indicates. (Remember to read the squares from the left on this row. If this instruction remains confusing, just think of it as looking at the chart through the back of the paper. Maybe that will help you visualize how the process works.)


There are now seven filled spaces indicated by the chart. The first filled block is made with two additional double crochets into the space below and a double crochet in the top of the double crochet from the row below. Most people work into the middle of the ch-2 space because it is quicker and much easier. Some meticulous people work into the chains of the ch-2 space because it gives a crisper edge to the square. You can decide whichever method you want to use. I’ve crocheted into the chain stitches with this design because it is so small and there aren’t that many open spaces within the filled blocks. If I do a large filet piece, with many open spaces, I readily crochet into the space to save time and aggravation. There are no filet “police” waiting to judge your work, so make yourself happy. Just work the same, throughout the piece.


The filled blocks share a double crochet on one side, so the initial filled block has four double crochets and the remaining filled blocks have three each. Does that make sense? Work double crochets into the tops of the stitches below until you’ve covered seven blocks. Chain 2, double crochet (to make a space), chain 2. Put the final double crochet into the third chain of the turning chain 5. This makes the final space on this row. Chain five to turn. Remember that when the next row begins with a space, you always chain five to turn. You always end a row with a double crochet in the third chain of this turning chain 5.


Use what you now know about working filet to complete this next row. Each space is created with a chain 2 and a double crochet. Each filled block is created with 3 double crochets, provided you don’t count the initial double crochet, which is the final double crochet from the previous block. I hope you can understand that. I can’t think of a clear way to explain it. Hopefully, the pictures help.


The fourth row has the first open space within a filled block. Make this with a ch 2, skipping two double crochets and then double crochet into the next stitch. Then, just carry on with the filled blocks and blank spaces.


The fifth row has spaces on both sides that “indent.” You make this space just like previous spaces, with (ch 2, skip 2, dc) Follow the chart to complete the remaining rows. The pictures help show where the stitches should be.


The final row should all be empty spaces to create the bit of border around the design.


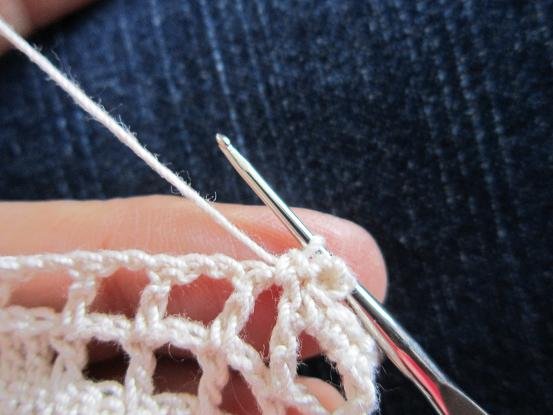
Many filet pieces are crocheted without an edging, but it is nice to add one. I’ll show you how to add a very simple edging worked with single crochet and the picot stitch. Without fastening off, chain 3. Make a picot with a slip stitch into the bottom of the chain. Work 3 single crochets into this first space and then again, chain 3.


You can also work the picots into the side of the last single crochet that you made.


Yarn over and bring it through both loops with a slip stitch.


Then go on to make 3 single crochets and a picot in the next space.


Make (3 sc, picot) in each space down the side of the filet piece.


Turn the corner with (3 sc, picot, 3 sc, picot).


Continue the edging all around the piece.


End with a slip stitch in the bottom of the first picot. Leave a 2-inch tail and clip the thread.


Use a tapestry needle to weave in the ends of the thread. Work on the back side of the piece and weave first in one direction and then reverse for a short space. Make sure the thread doesn’t show on the right side of the piece.


Block your finished work by spreading it on a flat surface with the right side up. Smooth the piece to the correct size. If necessary, use glass head pins to make it square. Hold a steam iron above the piece and let the steam penetrate for a few minutes. Then let the piece dry thoroughly.


I centered the patch at the bottom of a terry hand towel and hand stitched around the edging. In general, filet crochet looks best with some kind of contrasting background in order to notice and appreciate the picture. This ecru colored block, on the contrasting red towel, looks great. If you plan other filet pieces for your hope chest, using some kind of background behind or under the filet piece will make the design more obvious. Here is the chart. Merry Christmas from Miss Abigail’s Hope Chest.

Related Posts Plugin for WordPress, Blogger...